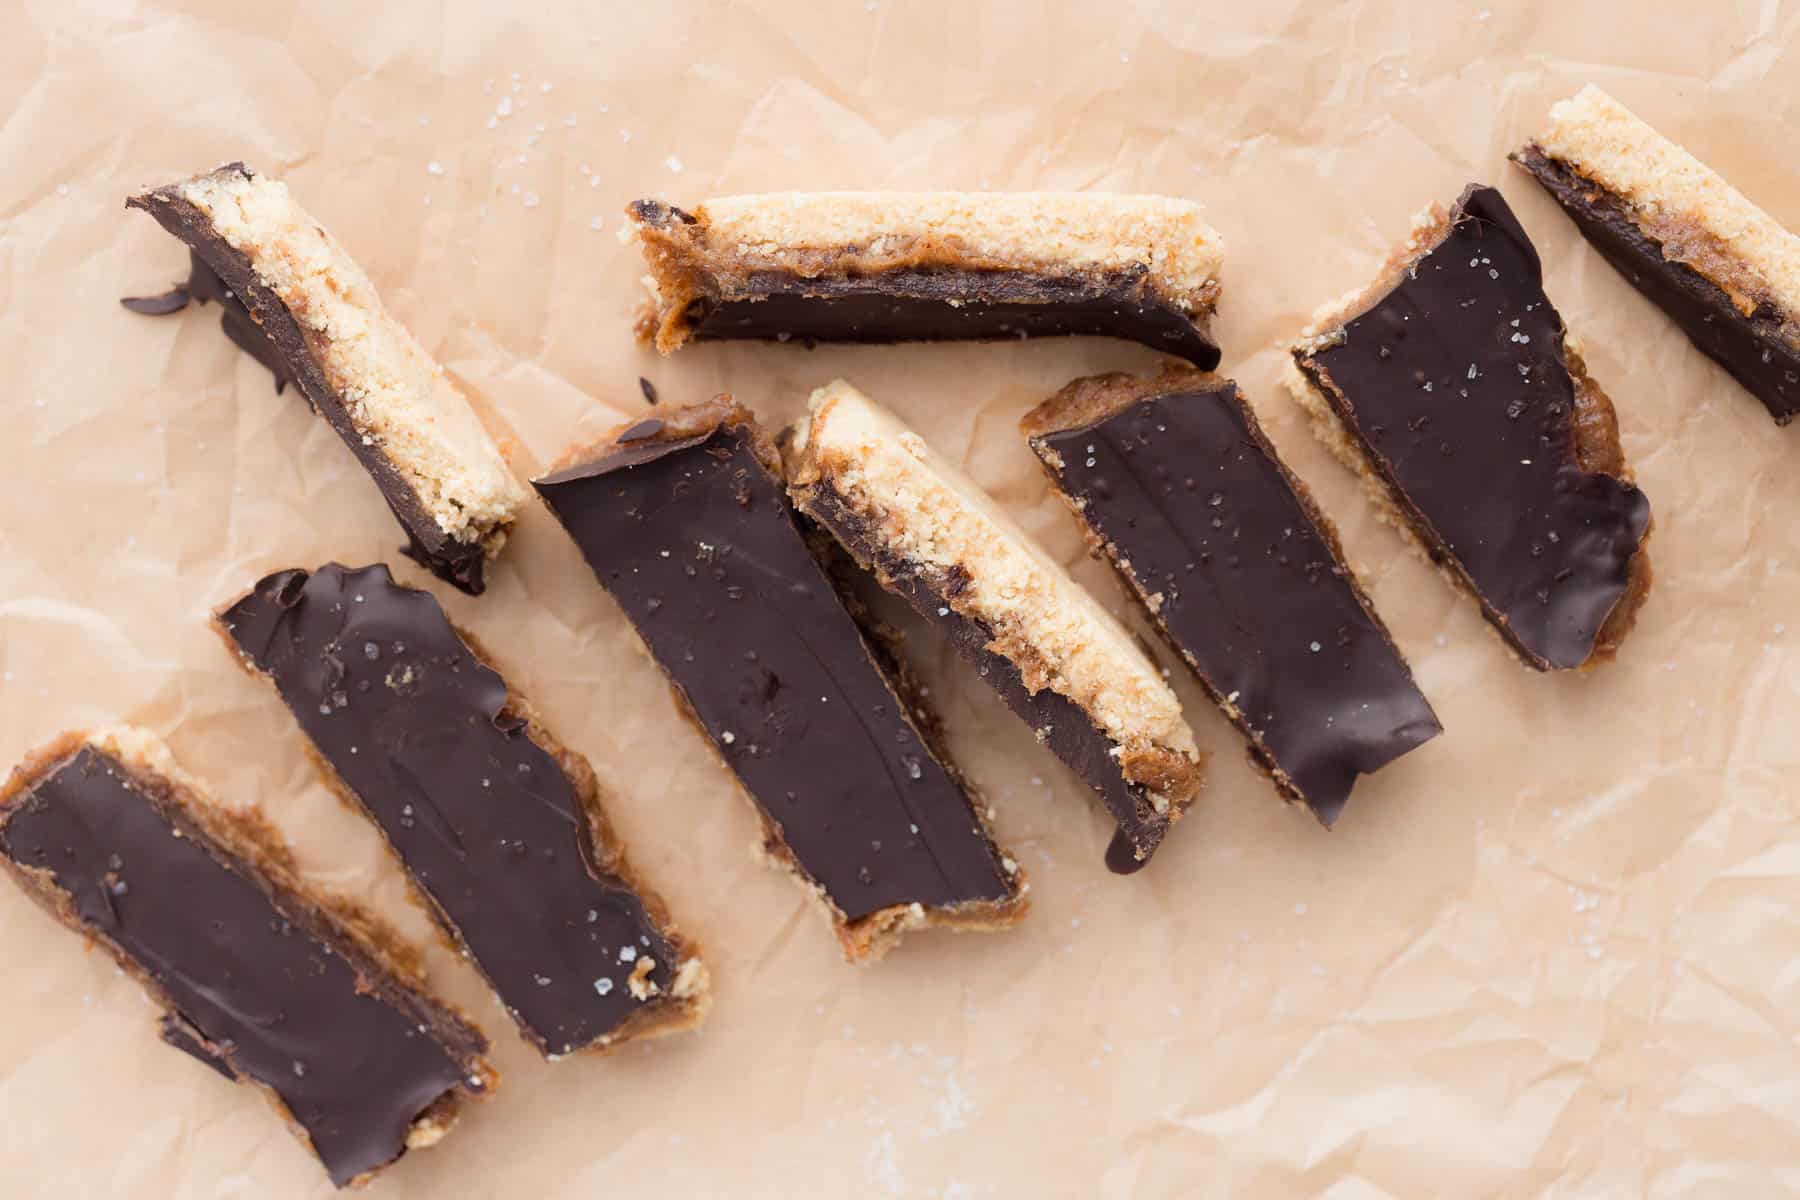
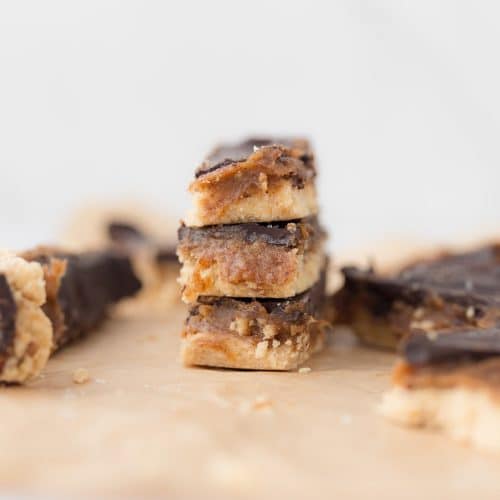
Healthy Twix Bars with Date Caramel
These healthy Twix bars have a shortbread-style base, a thick layer of naturally sweet date caramel, and a rich dark chocolate topping. They’re inspired by the classic candy bar but made with simple, wholesome ingredients – no corn syrup and no refined sugar.

QUICK LOOK: HEALTHY TWIX BARS WITH DATES
⏱️ Prep Time: 20 minutes
🔥 Bake Time: 12–14 minutes
❄️ Chill Time: 30–45 minutes
🕒 Total Time: About 1 hour 30 minutes
🍽️ Servings: 12 bars
🔢 Calories: ~220 per bar (estimated)
💡 Difficulty: Easy, beginner-friendly
🥣 Key Ingredients: Almond flour, coconut flour, maple syrup or honey, coconut oil, homemade date caramel, dark chocolate
🌿 Dietary Info: Naturally sweetened, vegan, gluten-free, dairy-free, grain-free
✨ What makes this recipe different:
Unlike traditional Twix bars that use corn syrup and refined sugar, these homemade Twix bars use wholesome ingredients while still delivering the same classic cookie-caramel-chocolate layers everyone loves.
Most healthy Twix bar recipes rely on maple syrup for the caramel layer, but after testing both versions, I found dates create a thicker, chewier caramel that’s much closer to a traditional Twix bar.
Dates are hands down my favorite way to sweeten desserts. They blend into a smooth, rich caramel that holds its shape when sliced, which is exactly what you want in a layered bar like this. Maple syrup is delicious, but it tends to stay a little too soft and can seep into the base over time. Date caramel gives you clean layers, better structure, and that classic chewy bite.
Using dates creates a caramel that:
- Holds its shape better
- Creates cleaner layers and slices
- Doesn’t soak into the cookie base
- Adds natural sweetness and fiber
- Delivers a richer caramel flavor
- Gives these bars that classic chewy bite
This recipe uses my homemade date caramel sauce, which I’ve tested in everything from bars to brownies and cheesecake fillings. If you’re looking for healthy Twix bars that actually mimic the texture of the original candy bar, date caramel is the secret.
If you love baking with dates as much as I do, check out my collection of date-sweetened desserts and refined sugar-free baking recipes after you make these bars.
Why You’ll Love These Healthy Twix Bars
Ingredients Notes & Substitutions
Here’s a look at the main ingredients and easy substitutions. For exact measurements and instructions, scroll down to the recipe card.

How to Make Healthy Twix Bars with Date Caramel
Time needed: 1 hour and 34 minutes
- Preheat the Oven
Preheat your oven to 350°F (175°C). Lightly grease an 8×8 glass baking dish or line a metal pan with parchment paper.
Tip: I used a glass baking dish as I find it works well for even baking in this recipe. - Make the Base
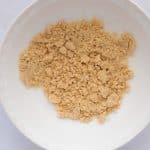
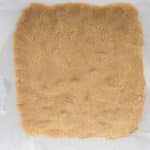
In a mixing bowl, combine the almond flour, coconut flour, maple syrup (or honey), melted coconut oil, vanilla, and salt. Mix until a soft dough forms. Press the dough firmly into the prepared pan, creating an even layer.
The dough should be soft and easy to press—if it feels dry, add a little more coconut oil or maple syrup.
- Bake the Base
Bake for 12–14 minutes, or until the edges are lightly golden.
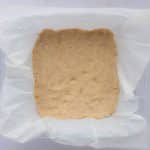
Remove from the oven and let the base cool completely before adding the caramel.
Important: Adding the date caramel while the base is warm can cause it to melt and lose definition
- Make the Date Caramel
While the base is cooling, make the date caramel sauce.
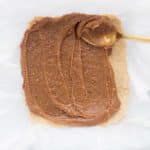
Once the base is fully cooled, spread one full recipe of date caramel evenly over the top.
Place the pan in the refrigerator for about 15 minutes to help the caramel firm up slightly before adding the chocolate.
- Melt the Chocolate
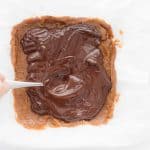
Melt the dark chocolate chips gently, either in a microwave-safe bowl in 20–30 second intervals or over a double boiler. Stir until smooth.
- Chill & Slice
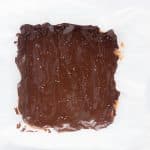
Pour the melted chocolate over the caramel layer and spread evenly. Sprinkle sea salt, if using.
Refrigerate for 20–30 minutes, or until fully set.
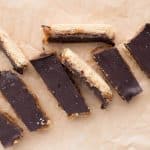
Once firm, slice into bars using a warm knife for clean edges.


I’d love to hear how your baking turned out!
Leave a review and star rating to let me know what you think.
Don’t forget to tag me on Instagram so I can see and share your creations @thesprinkledcakery!
Healthy Twix Bars with Date Caramel
Equipment
- 1 food processor or blender for date caramel
- Measuring Cups & Spoons
- Mixing bowls
- 8×8 inch baking dish
Ingredients
Base Layer
- ¾ cup almond flour
- ¼ cup coconut flour
- 3 tbsp maple syrup or honey
- ¼ cup melted coconut oil
- 1 tsp vanilla extract
- ¼ tsp salt
Caramel Layer
- 1 batch homemade date caramel
Chocolate Layer
- 1 cup about 250 g dark chocolate chips
Instructions
Preheat the Oven
- Preheat your oven to 350°F (175°C). Lightly grease an 8×8 glass baking dish or line a metal pan with parchment paper.Tip: Glass baking dishes work especially well for even baking in this recipe.

Make the Base
- In a mixing bowl, combine the almond flour, coconut flour, maple syrup (or honey), melted coconut oil, vanilla, and salt. Mix until a soft dough forms.The dough should be slightly oily but easy to press—if it feels dry, let it sit for a minute so the coconut flour can absorb moisture.¾ cup almond flour, ¼ cup coconut flour, 3 tbsp maple syrup or honey, ¼ cup melted coconut oil, ¼ tsp salt, 1 tsp vanilla extract
Bake the Base
- Press the dough firmly into the prepared pan, creating an even layer. Bake for 12–14 minutes, or until the edges are lightly golden.
- Remove from the oven and let the base cool completely before adding the caramel.Important: Adding caramel while the base is warm can cause it to melt and lose definition.
Add the Date Caramel
- Once the base is fully cooled, spread one full recipe of date caramel evenly over the top.Place the pan in the refrigerator for about 15 minutes to help the caramel firm up slightly before adding the chocolate.1 batch homemade date caramel
Melt the Chocolate
- Melt the dark chocolate chips gently, either in a microwave-safe bowl in 20–30 second intervals or over a double boiler. Stir until smooth. Then, pour the melted chocolate over the caramel layer and spread evenly. Sprinkle sea salt on top, if using.1 cup about 250 g dark chocolate chips
Chill
- Refrigerate for 20–30 minutes, or until fully set.
- Once firm, slice into bars using a warm knife for clean edges.
Video
Notes
Macros Per bar (based on 12 bars):
- Calories: 215 kcal
- Protein: 3g
- Fat: 13g
- Carbs: 23g
- Fiber: 3g
Tips & Notes
- Chill between layers for clean, defined slices
- Warm your knife under hot water, then wipe dry before slicing
- Store bars chilled for the best texture. Refrigerate for up to 7 days or freeze up to 3 months.
Macros (per bar, based on 12 bars)
- Calories: 215 kcal
- Carbs: 23g
- Sugar: 13g
- Fat: 13g
- Fiber: 3g
- Protein: 3g
NOTE: Nutrition is an estimate and will vary based on ingredient brands used.
Flavor Variations
Classic Twix Style: Dip the fully chilled bars into melted chocolate to coat all sides
Crunchy Twix Bars: Use crisped quinoa or puffed rice in the chocolate layer for extra cruncy
Peanut Butter: Add a thin layer of peanut butter under the caramel
Twix Cups: Press the base into muffin liners instead of a pan
Protein Twix Bars: Replace the coconut flour with protein powder in the shortbread-style base. And, if you love protein candy bars, make sure you check out my Snickers Protein Bars recipe for a high-protein, refined sugar-free protein bar with 17g of protein each.
Want more high-protein recipes? You’ll love my protein brownie mug cake, easy no-bake Biscoff cheesecake cups or if you want an entire classic cheesecake, try my full-sized no-bake Biscoff protein cheesecake.
Frequently Asked Questions
Healthy Twix bars are a better-for-you alternative to traditional Twix because they’re made with whole-food ingredients like almond flour, coconut oil, dates, and dark chocolate. While they’re still a treat, they contain no refined sugar and offer more fiber and nutrients than store-bought candy bars.
Yes, but the texture will be different. Dates create a thick, chewy caramel layer that closely resembles a traditional Twix bar. If you’d prefer not to use dates, you can try a maple syrup-based caramel, but it will be softer and may not hold its shape as well when sliced.
Traditional caramel is typically made with sugar, corn syrup, cream, and butter, while date caramel is made primarily from whole dates. Dates provide naturally occurring fiber, vitamins, and minerals, making them a more nutrient-dense option. While both are still sweet treats, date caramel is a less processed alternative to traditional caramel.
Most healthy Twix bar recipes use a shortbread-style base, a caramel layer, and chocolate. This version uses almond flour and coconut flour for the base, homemade date caramel for natural sweetness, and dark chocolate for the topping.
Yes. Because these healthy Twix bars are made with date caramel, they should be stored in the refrigerator so the layers stay firm and slice cleanly.
Healthy Twix bars freeze very well. Store them in an airtight container in the freezer for up to 3 months and thaw briefly before serving.
Most healthy Twix recipes use maple syrup caramel, which stays soft. These bars use date caramel, creating a thicker, chewier layer that more closely mimics classic Twix bars.
Medjool dates are my favorite choice for date caramel because they’re naturally soft, moist, and have a rich caramel-like flavor. If your dates feel dry, soak them in warm water for 10–15 minutes before blending to help create a smooth, creamy caramel. If you want to learn more about baking with dates, check out my guide to baking with dates.
Yes. To make these bars nut free, replace the almond flour with a gluten-free all-purpose flour blend or oat flour. If your date caramel recipe includes nut butter, use sunflower seed butter instead. The texture may vary slightly, but the bars will still be delicious.
Date caramel can become too thick if the dates are dry or if there isn’t enough liquid added during blending. Simply add warm water, dairy-free milk, or coconut milk one tablespoon at a time until you reach a smooth, spreadable consistency. Keep in mind that the caramel will thicken slightly as it chills.
More Bar Recipes You’ll Love:
- Homemade High-Protein “Kind-Style” Energy Bars
- Snickers Protein Bars – High-Protein, Refined Sugar-Free, 17g Protein per Bar
- Cinnamon Rice Cake Protein Bars (with Dates & Maple Cream Cheese Frosting)
- Healthy Peppermint Sugar Cookie Bars (Refined Sugar Free, Gluten Free, High Protein)
- Protein Sugar Cookie Bars (Refined Sugar Free, Gluten Free)
- Mini Egg Cookie Dough Protein Bars