Biscoff Protein Cheesecake Cups

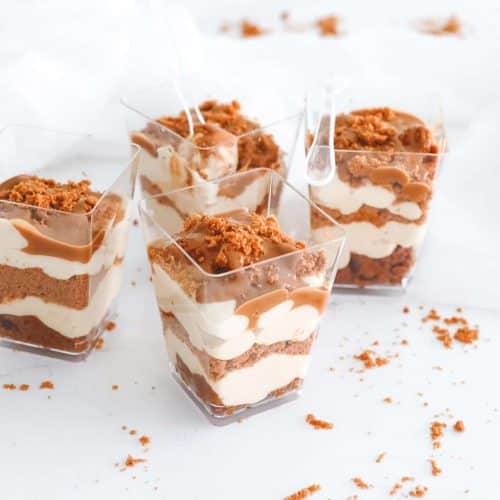
These High-Protein Biscoff Cheesecake Cups are creamy, no-bake and made for meal prep. Each single-serve cup has 18g of protein from Greek yogurt, protein powder and collagen, with layers of Biscoff cookie crust, creamy cheesecake filling and melted Biscoff spread on top.

QUICK LOOK: BISCOFF PROTEIN CHEESECAKE CUPS
⏱️Prep Time: 20 minutes
❄️ Chill Time: 1 hour
🕒 Total Time: 1 hour 20 minutes
🍽️ Servings: 4 Cheesecake cups
🔢 Calories: ~418 kcal per cup (estimated)
💡 Difficulty: Easy, no-bake recipe
🥣 Key Ingredients: Cream cheese, Greek yogurt, Biscoff spread, Biscoff cookies, coconut oil, collagen, protein powder, vanilla
🌿 Dietary Info: No-bake, High-protein with protein, hormone-friendly options
✨What makes these different from every other protein cheesecake you’ve seen? Most recipes just throw in some Greek yogurt and call it high-protein. These use both collagen powder and protein powder, which bumps the protein up to 18g per cup while also giving you the joint and skin benefits most dessert recipes completely ignore. Plus it uses real cream cheese because that’s what actually makes it taste like cheesecake and not a yogurt cup.
These High-Protein Biscoff Cheesecake Cups are an easy single-serve dessert made with Greek yogurt, cream cheese, protein powder and collagen for 18g of protein per cup. They’re layered with a Biscoff cookie crust and creamy Biscoff cheesecake filling, then chilled in individual jars or dessert cups.
I originally created these for meal prep, so you can keep a few individual cheesecake cups ready in the fridge instead of making a full cheesecake. They don’t use cottage cheese or gelatin and only need about an hour to chill.
Looking for a cheesecake you can slice and serve instead? My Biscoff Cottage Cheese Cheesecake is a full-size version made without protein powder and uses blended cottage cheese and Greek yogurt for the protein.
If you love Biscoff but want something for breakfast, try my High Protein Biscoff Overnight Oats. For more high-protein desserts you can prep ahead, my Biscoff Protein Cottage Cheese Ice Cream and Dubai Chocolate Pistachio Protein Energy Balls are two more easy options.
*This page may contain referral links for products I use and love. As an Amazon Associate, The Sprinkled Cakery earns a small commission on these links at no cost to you. Read my full disclosure here.
Recommended Supplies/Tools
- Mixing bowls
- Electric mixer or hand whisk
- Small Glass Jars to store them in the fridge.
- Spatula for mixing
How to Make Biscoff Protein Cheesecake Cups:
- Prepare the Lotus Cookie Crust:
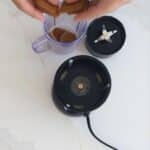
- Crush 12 Biscoff cookies until fine using a blender or a bag with a mallet.
- Mix in 1 tablespoon of melted coconut oil until fully incorporated.
- Line the bottom of four cheesecake cups or dishes with the cookie crumbs.
- Make the Cheesecake Filling:
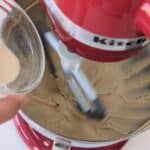
- In a bowl, combine 1/2 cup softened cream cheese, 3/4 Greek yogurt, 2 scoops of collagen powder, 1 scoop of unflavored protein powder, three tablespoons of Biscoff spread, and 1 teaspoon of vanilla extract. Mix until smooth and creamy.
- Assemble the Mini Cheesecake Dessert Cups:
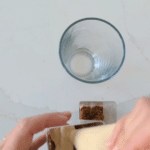
- Top the cookie crust in each cup with a layer of the cheesecake filling mixture.
- Add another layer of cookie crumbs on top of the filling.
- Finish with the remaining cheesecake filling.
- Final Touches:
- Melt the remaining tablespoon of Biscoff spread and drizzle it over the cheesecake cups.
- Sprinkle any remaining cookie crumbs on top for added texture.

Why I Use Both Collagen and Protein Powder
I use a combination of collagen and protein powder in these cheesecake cups instead of relying on Greek yogurt alone. It brings each cup to about 18g of protein while keeping the filling thick and creamy. Using some collagen also means I don’t need as much protein powder, which helps keep the protein powder flavor from overpowering the Biscoff.
How to Store & Meal Prep Biscoff Cheesecake Cups
These Biscoff Cheesecake Cups work really well for meal prep because they’re already portioned into individual servings. Make all four at once, cover each jar or dessert cup and keep them in the fridge so they’re ready when you want one.
Fridge: Store the cheesecake cups covered in the refrigerator for up to 4 days. I like using small glass jars with lids so I can make and store them in the same container.
For meal prep: You can assemble the crust and cheesecake filling ahead of time, then refrigerate the cups until you’re ready to eat them. The filling actually gets thicker after a few hours in the fridge, so making them the night before works really well.
Keep the topping crunchy: If you’re making the cups several days ahead, wait to add the crushed Biscoff cookies on top until just before serving. The cookies will soften as they sit in the fridge.
Biscoff topping: You can add the melted Biscoff layer when you assemble the cups or wait until serving. If it firms up in the fridge, let the cup sit at room temperature for a few minutes before eating.
Freezing: I prefer these cheesecake cups from the fridge rather than frozen. Freezing can change the texture of the Greek yogurt and cream cheese filling once thawed, so for meal prep I’d stick with making a few days at a time.
Trish’s Tips Tips for Creamy Biscoff Cheesecake Cups
If you want your single-serve Biscoff Cheesecake Cups to turn out creamy and thick, these are a few tips I learned from my years working as a professional cake baker and decorator:
- Start with softened cream cheese. Let it come to room temperature before mixing so it blends smoothly into the Greek yogurt without leaving little lumps in the filling.
- Use thick Greek yogurt. A thicker Greek yogurt will give you a creamier, more cheesecake-like filling. Regular yogurt has more moisture and can make the filling too soft.
- Use full-fat dairy for the creamiest texture. Full-fat cream cheese and Greek yogurt give the filling a richer texture and help it stay thick.
- Add the protein powder gradually. Different protein powders absorb moisture differently. Mix it in and check the consistency before adding anything extra.
- Crush the Biscoff cookies finely for the crust. Fine crumbs pack together better and make it easier to get a little crust in every spoonful.
- Press the crust down firmly. I like to use the back of a spoon or the bottom of a small glass so the cookie layer doesn’t immediately crumble into the filling.
- Warm the Biscoff topping just until pourable. You only need about 20 seconds in the microwave. Let it cool slightly before adding it over the cheesecake filling so it doesn’t soften the top layer.
- Chill for at least 1 hour. The filling will thicken as it sits in the fridge, but I actually prefer the texture after a few hours or overnight.
- Wait to add crunchy toppings. If you’re meal prepping the cups for several days, add extra crushed Biscoff cookies right before eating so they stay crunchy.
Macros Per Cheesecake Cup
- Calories: ~418
- Protein: ~18g
- Carbs: ~32g
- Fat: ~25g
NOTE: Nutrition information is an estimate based on the ingredients used and may vary depending on brands and substitutions.
Frequently Asked Questions:
Yes, feel free to use vanilla or caramel-flavored protein powder for this recipe.
These cheesecake cups will keep well in the refrigerator for up to 4-5 days when stored with the tops on or in an airtight container.
Yes, simply use gluten-free graham cracker crumbs or gluten-free Schär Spekulatius biscuits for the crust.
The viral Japanese Biscoff cheesecake is made by adding Biscoff cookies directly into a full tub of yogurt. It’s super simple but a single serving can pack a lot of calories and very little protein. These cups give you the same creamy Biscoff flavor but with 18g of protein per serving, a fraction of the calories, and a proper layered crust so it actually feels like a real dessert — not just a tub of yogurt with cookies in it.
Yes, if you don’t have protein powder on hand you can leave it out and just use the collagen, or swap it for an extra tablespoon of Greek yogurt. The texture will be slightly softer and the protein will drop to around 10-12g per cup, but they’ll still taste great.
Yes, you can use malt biscuits instead of Biscoff. They will give you the exact same crunchy texture, but with a more mellow, toasty sweetness instead of Biscoff’s distinct cinnamon spice flavor.
Tip: If you want to mimic that classic Biscoff taste using malt biscuits, just mix a pinch of ground cinnamon into your crushed cookie crust!
For no-bake cheesecake cups, you should always let them set in the fridge for at least 1 hour (or overnight) before eating. This gives the filling time to firm up while keeping its perfectly smooth, creamy texture. While you can pop them in the freezer for 15 to 20 minutes if you’re in a rush to speed things up, don’t leave them in there to fully freeze. Freezing can make the dairy separate and turn the texture icy rather than creamy once it thaws.
More Biscoff Recipes You’ll Love:


I’d love to hear how your baking turned out!
Leave a review and star rating to let me know what you think.
follow along
High-Protein No-Bake Biscoff Cheesecake Cups (18g protein)
Ingredients
- 12 Biscoff cookies. See notes for where to purchase.
- 1 tbsp coconut oil melted
- ¾ cup Plain Greek Yogurt
- ½ cup cream cheese softened to room temperature
- 4 tbsp biscoff spread. I like to use the creamy one for this dessert, not the crunchy. divided into 3 tbsps for the mixture and 1 tbsp for topping
- 2 tbsp collagen powder.
- 1 scoop unflavoured or vanilla protein powder. See notes for recommendations.
- 1 tsp vanilla extract
Instructions
Prepare the Crust:
- Crush 12 Biscoff cookies until fine using a blender or a bag with a mallet. Mix in 1 tablespoon of melted coconut oil until fully incorporated. Then Line the bottom of four cheesecake cups, mini mason jars or dishes with the cookie crumbs.12 Biscoff cookies. See notes for where to purchase.

Make the Cheesecake Filling:
- In a bowl, combine the softened cream cheese, Greek yogurt, collagen, unflavored protein powder, three tablespoons of Biscoff spread, and vanilla extract. Mix until smooth and creamy.¾ cup Plain Greek Yogurt, ½ cup cream cheese, 4 tbsp biscoff spread. I like to use the creamy one for this dessert, not the crunchy., 2 tbsp collagen powder., 1 scoop unflavoured or vanilla protein powder. See notes for recommendations., 1 tsp vanilla extract
Assemble the Cheesecake Cups:
- Top the cookie crust in each cup with a layer of the cheesecake filling mixture.
- Add another layer of cookie crumbs on top of the filling.
- Finish with the remaining cheesecake filling.
Drizzle Melted Biscoff:
- Melt the remaining tablespoon of Biscoff spread and drizzle it over the cheesecake cups. Sprinkle any remaining cookie crumbs on top for added texture. Chill the cheesecake cups for at least 1 hour to set properly before serving, or let set overnight.4 tbsp biscoff spread. I like to use the creamy one for this dessert, not the crunchy.

Video
Notes
- Use full-fat cream cheese and Greek yogurt for the creamiest texture.
- Adjust the sweetness to your preference by adding more or less Biscoff spread.
- Make it gluten-free by using gluten-free graham cracker crumbs or gluten-free Schär Spekulatius biscuits for the crust.
- You can purchase Biscoff cookies on Amazon or at your local grocery store in the cookie aisle.
- My favorite clean protein brand is Good Protein and Truvani because they are 100% natural plant-based protein powders.
- For the Collagen, I like the Organika brand.
Macros Per Cheesecake Cup:
- Calories: ~418 | Protein: ~18g | Carbs: ~32g | Fat: ~25g
- Note: Macros are estimated and will vary based on ingredients and brands used.